


Automating your Unifi Controller Installation on Ubuntu using Bash scripting.


Introduction
Encountering hurdles during software installations can be a frustrating experience, especially when outdated instructions lead to dependency issues, errors as well as security concerns. Recently, while setting up my Unifi software on Ubuntu 22.04, I faced such challenges. The latest Unifi controller version required MongoDB 3.6 (up to v4.4), yet the instructions referred to an expired GPG key for MongoDB 3.6. Additionally, encountering dependency problems added to the complexity.
Overcoming these obstacles required thorough research & perseverance, qualities I strongly encourage you to embrace when confronted with similar challenges. Demonstrating resourcefulness in this manner can lead to successful outcomes as long as you don't give up.
Purpose
Eager to get this system up & running with minimal steps involved, the goals I had in mind was being able to streamline the setup process, ensure consistency, & easily reproduce the installation on multiple servers to manage my network infrastructure.
With that being said, let's move on to the good stuff :)
Script Overview:
Our script performs the following actions:
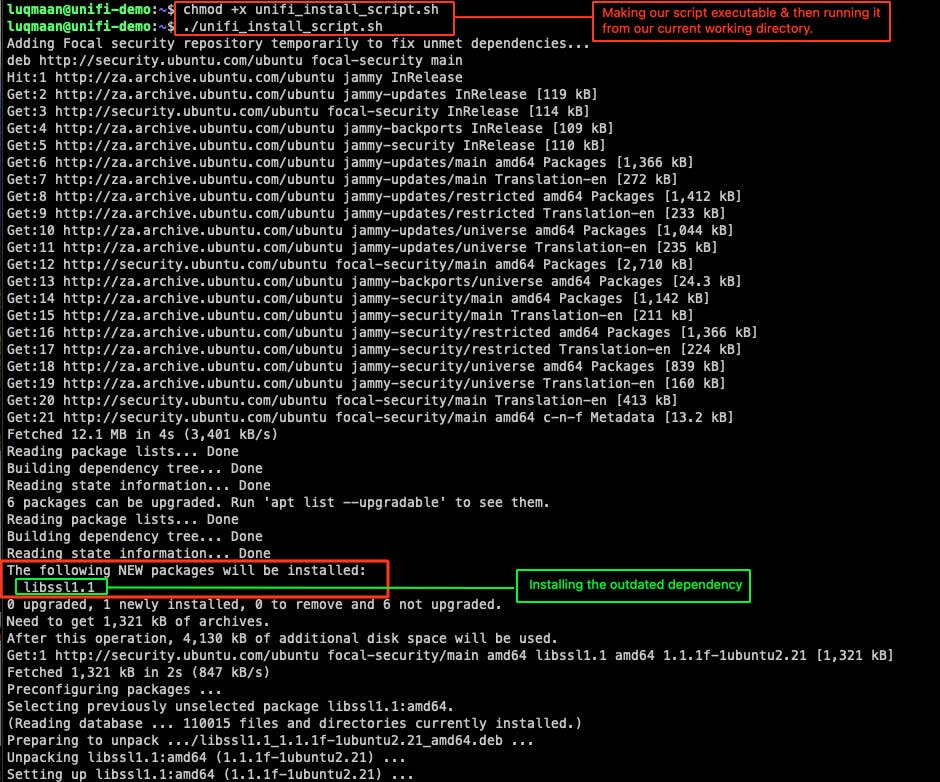
Temporarily adding the Focal security repository to resolve unmet dependencies for
libssl1.1.Update package lists & upgrades installed packages on our system.
Adds the Unifi repository to the sources list for easy access to Unifi packages.
Download the Unifi repository GPG key to verify the authenticity of the downloaded packages.
Install MongoDB 4.4 to meet the Unifi controller's dependencies.
Install the Unifi controller package.
Initiate & enables the Unifi service to ensure it runs automatically.
Verifying the status of the Unifi service to ensure it's running properly.
Writes the output to the screen as well as a log file in our current directory.
Running the script:
To utilise the script, we need to:
Copy/paste the script into your preferred text editor.
Customise the script as needed(if you know what you're doing).
Make the script executable by running
chmod +x name_of_your_script.sh.Run the script with
./name_of_your_script.sh.Follow the on-screen prompts for installation.
Ensure port 8443 is open for Unifi controller access.
- The Unifi controller runs on port 8443 so make sure the port is open (if ufw is active, simply run
sudo ufw allow 8443 && ufw reload)
- The Unifi controller runs on port 8443 so make sure the port is open (if ufw is active, simply run
#!/bin/bash
#Write the output to a log file (Optional)
LOG_FILE="unifi_installation.log"
#Set the script to exit immediately if any command returns a non-zero status
set -e
#print error message & exit
print_error_and_exit() {
echo "Error: $1" | tee -a "$LOG_FILE"
exit 1
}
#check whether the command was successful.
check_success() {
if [ $? -ne 0 ]; then
print_error_and_exit "$1"
fi
}
#Here we create a function to log messages which can be very useful for troubleshooting.
log_message() {
echo "$1" | tee -a "$LOG_FILE"
}
#Add Focal security repository temporarily to fix unmet dependencies.
log_message "Adding Focal security repository temporarily to fix unmet dependencies..."
echo "deb http://security.ubuntu.com/ubuntu focal-security main" | sudo tee /etc/apt/sources.list.d/focal-security.list | tee -a "$LOG_FILE"
check_success "Failed to add Focal security repository."
sudo apt update
check_success "Failed to update packages."
#Install dependency(update this line if any additional dependencies are required or remove or comment it out if you already have this library installed.)
sudo apt install -y libssl1.1
check_success "Failed to install libssl1.1."
sudo rm /etc/apt/sources.list.d/focal-security.list
check_success "Failed to remove Focal security repository."
sudo apt update
check_success "Failed to update packages after removing Focal security repository."
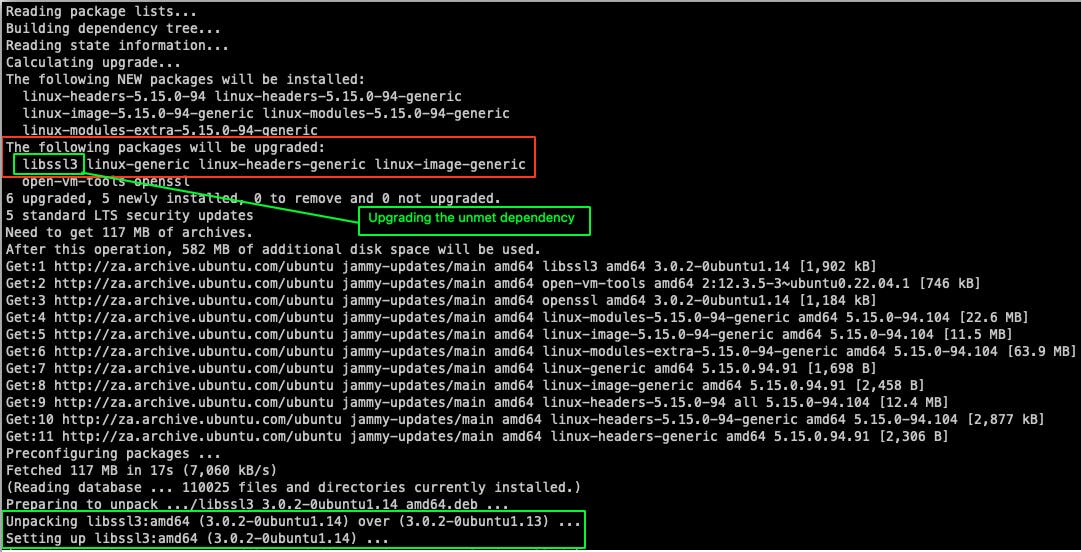
#Update package lists & upgrade installed packages
log_message "Updating package lists & upgrading installed packages..."
sudo apt update && sudo apt upgrade -y | tee -a "$LOG_FILE"
check_success "Failed to update and upgrade packages."
#Add Unifi's repository to sources list.
log_message "Adding Unifi repository to sources list..."
echo 'deb https://www.ui.com/downloads/unifi/debian stable ubiquiti' | sudo tee /etc/apt/sources.list.d/100-ubnt-unifi.list | tee -a "$LOG_FILE"
check_success "Failed to add Unifi's repository to sources list."
#Download Unifi's repository GPG key.
log_message "Downloading Unifi's repository GPG key..."
wget -qO - https://dl.ui.com/unifi/unifi-repo.gpg | sudo gpg --dearmor -o /etc/apt/trusted.gpg.d/unifi-repo.gpg | tee -a "$LOG_FILE"
check_success "Failed to download Unifi's repository GPG key."
# Install MongoDB 4.4
log_message "Installing MongoDB 4.4..."
sudo apt install gnupg -y
wget -qO - https://www.mongodb.org/static/pgp/server-4.4.asc | sudo gpg --dearmor -o /etc/apt/trusted.gpg.d/mongodb-org-4.4.gpg
echo "deb [ arch=amd64,arm64 ] https://repo.mongodb.org/apt/ubuntu focal/mongodb-org/4.4 multiverse" | sudo tee /etc/apt/sources.list.d/mongodb-org-4.4.list | tee -a "$LOG_FILE"
sudo apt update
sudo apt install -y mongodb-org
check_success "Failed to install MongoDB 4.4."
# Install the Unifi package
log_message "Installing UniFi..."
sudo apt update && sudo apt install unifi -y | tee -a "$LOG_FILE"
check_success "Failed to install Unifi."
# Start & enable the Unifi service
log_message "Starting & enabling Unifi service..."
sudo systemctl start unifi
check_success "Failed to start Unifi service."
sudo systemctl enable unifi
check_success "Failed to enable Unifi service."
# Check the status of the Unifi service
log_message "Checking the status of the Unifi service..."
if systemctl is-active --quiet unifi; then
log_message "Unifi service is running."
else
print_error_and_exit "Unifi service failed to start."
fi
# Output the web interface URL to the screen.
log_message "Unifi installation complete. Browse to https://localhost:8443/ to access the Unifi web interface."
Output & results:
After our script has finished, we should see a log file in our present working directory that provides transparency throughout the installation process:

If the script executed successfully, browse to https://<your_server_ip>:8443/ to access the Unifi web interface.
Configuring the Unifi controller
Since this is a Homelab, you might have your own requirements so I won't be diving too deep but it will be enough to get you up & running.
The first few on-screen prompts is self explanatory but I'll add some screenshots as we go through the setup process.
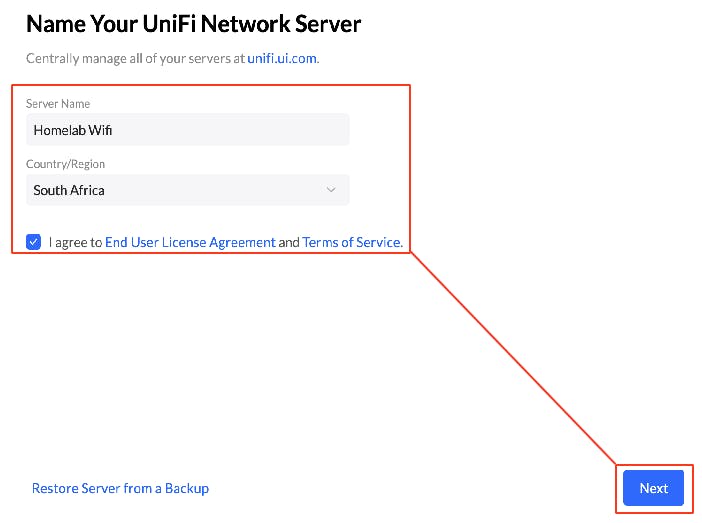
Step 1 - Setting up your controller
Complete the below & click Next.
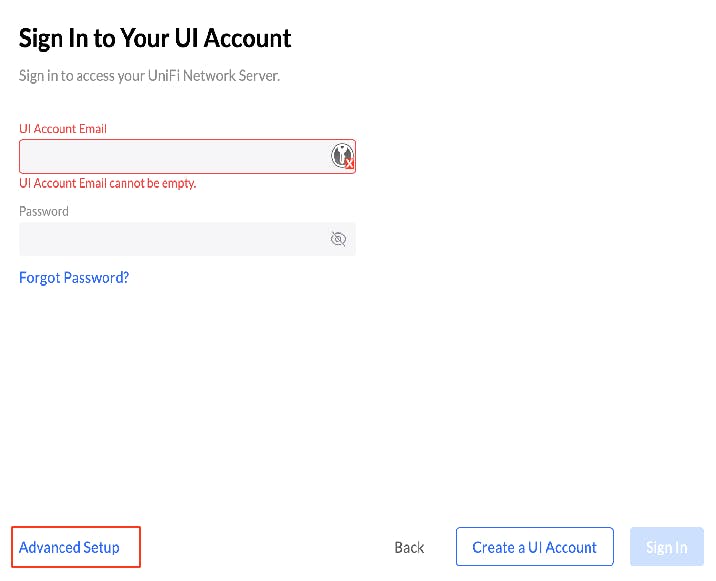
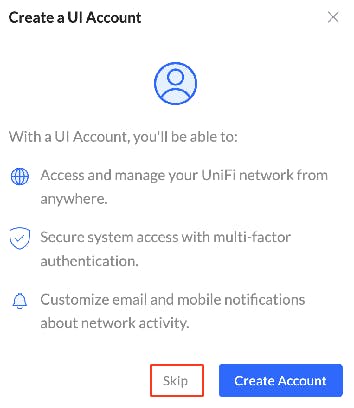
Step 2 - Sign-in options
Here I'll be creating a local account but feel free to read up on the options listed below or check out: Connecting to and Managing Unifi Deployments.
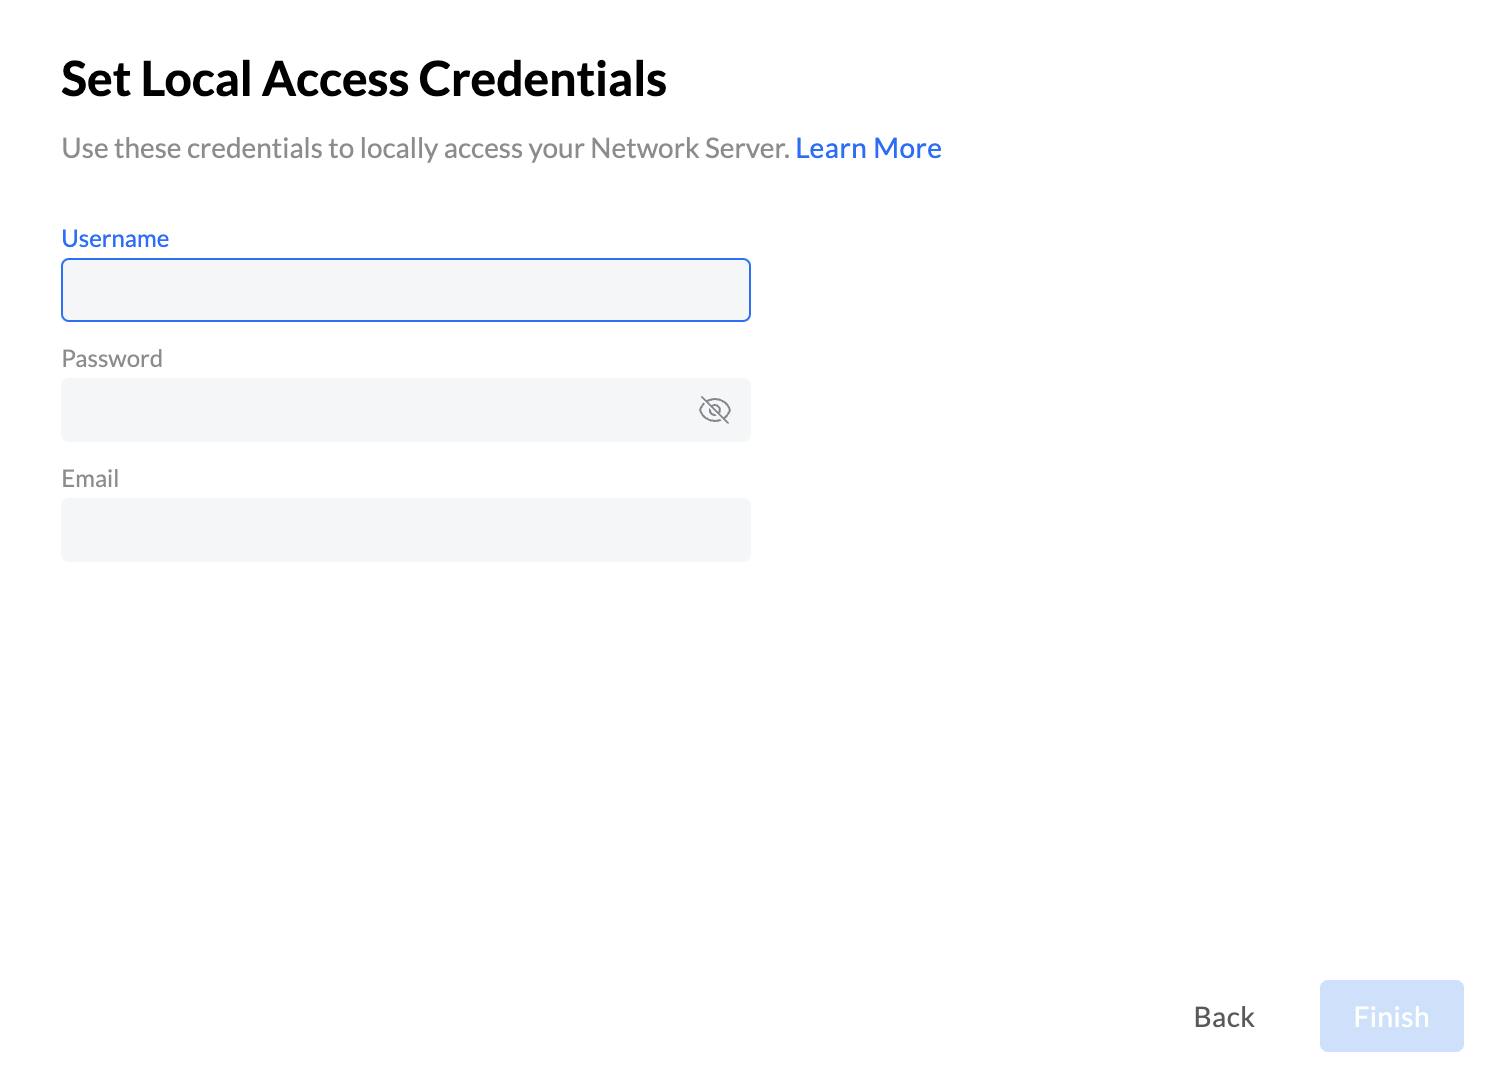
Step 3 - Set credentials
Click Finish after filling in your credentials.
Step 4 - Configuring our Network
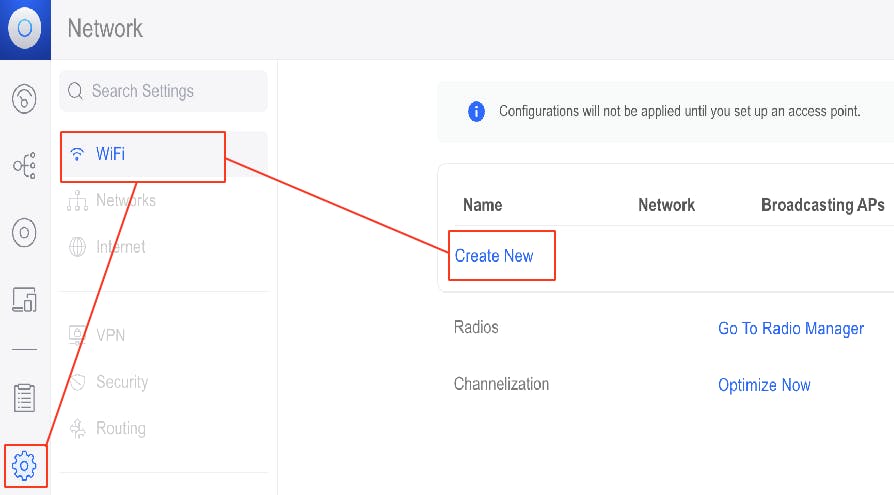
The steps below is where we'll set our SSID(Wifi Name) & Pre-Shared Key(Wifi Password).
Under the Advanced options, the only change I've made was deselecting**BandSteering** as not all my devices are in close range to where my access point is placed.

As you scroll down, make sure to select WPA2 as the security protocol or WPA2/WPA3 depending whether your clients supports it.
There's a list of options you can read up on & play around with to figure out what works best for you.
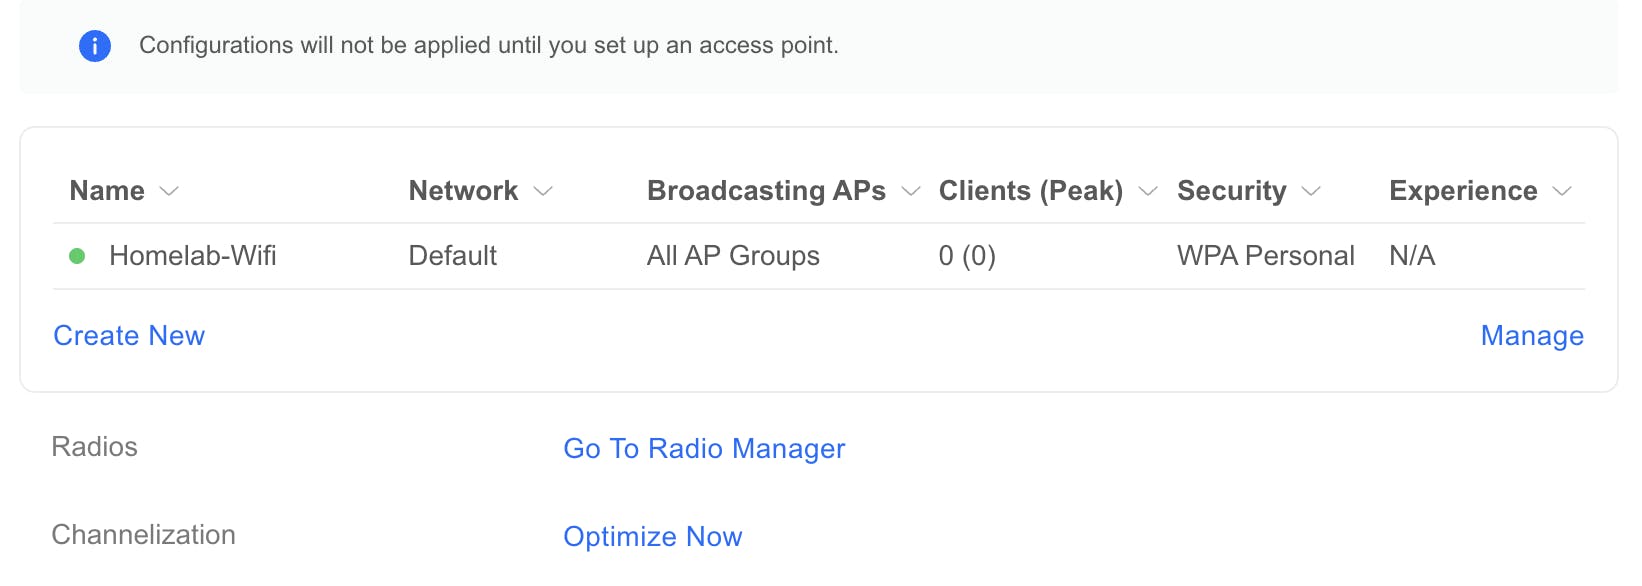
After successfully creating our Network, it should look like this:
Step 5 - Adopting our Unifi devices
In this example, I will be connecting a UAP-AC-PRO.
In order to adopt the device, we need to reset it by navigating to the left pane under Unifi Devices => Click to Learn More:
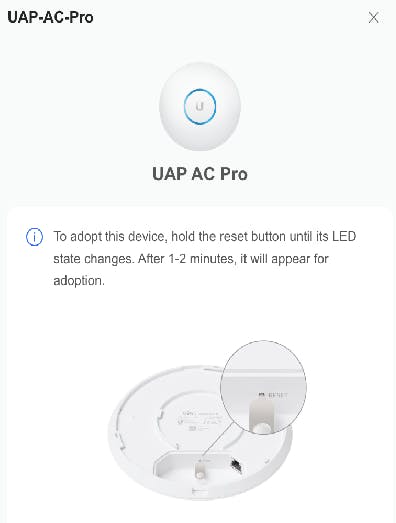
After successfully resetting our Unifi device/s, proceed with the adoption process & wait until it finishes.
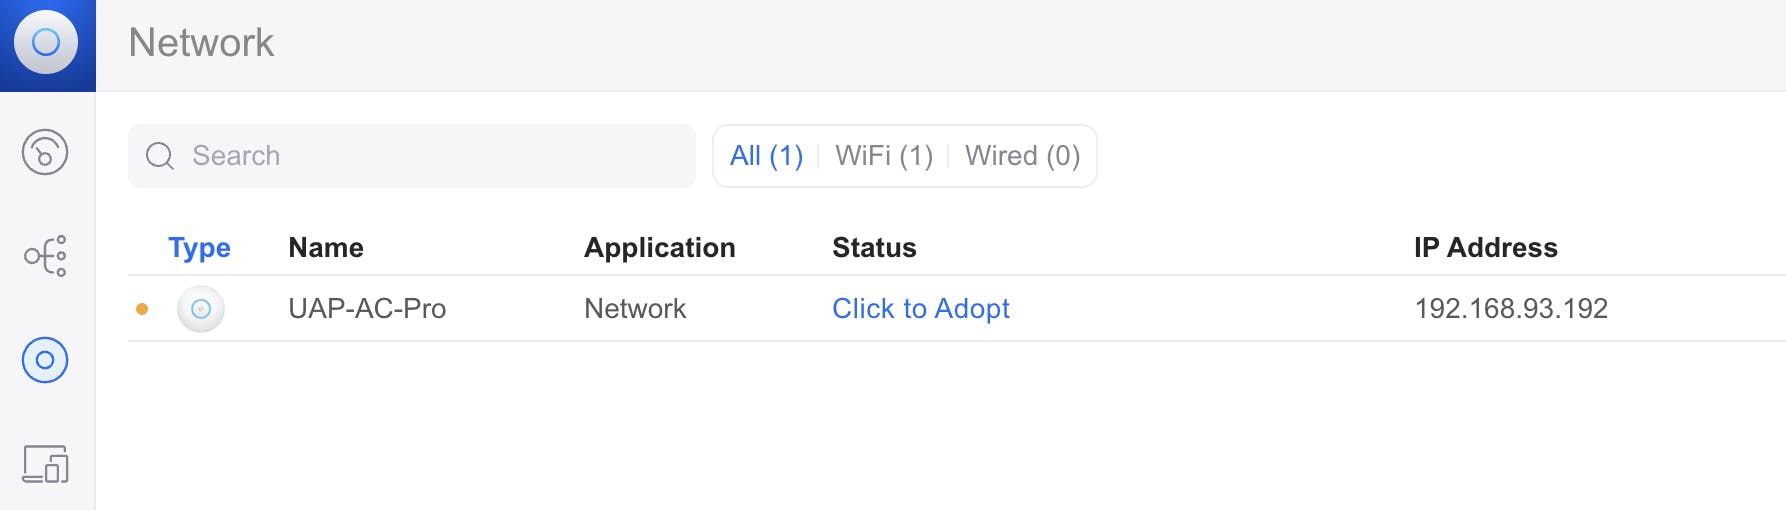
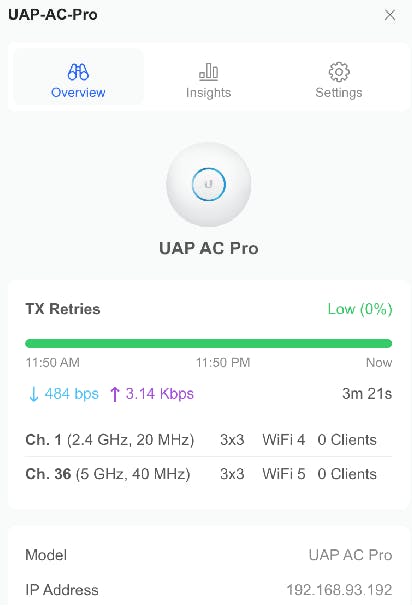
Once done, you should see the following:
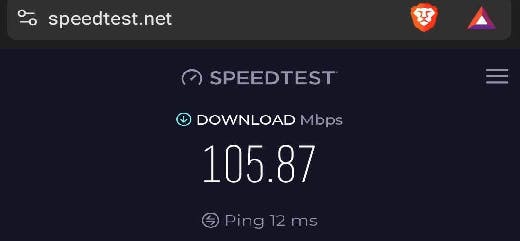
Step 6 - Testing our Access Point
Use your Mobile/PC to connect to your access point & run a speed test:
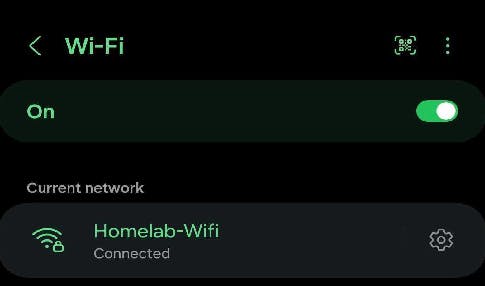
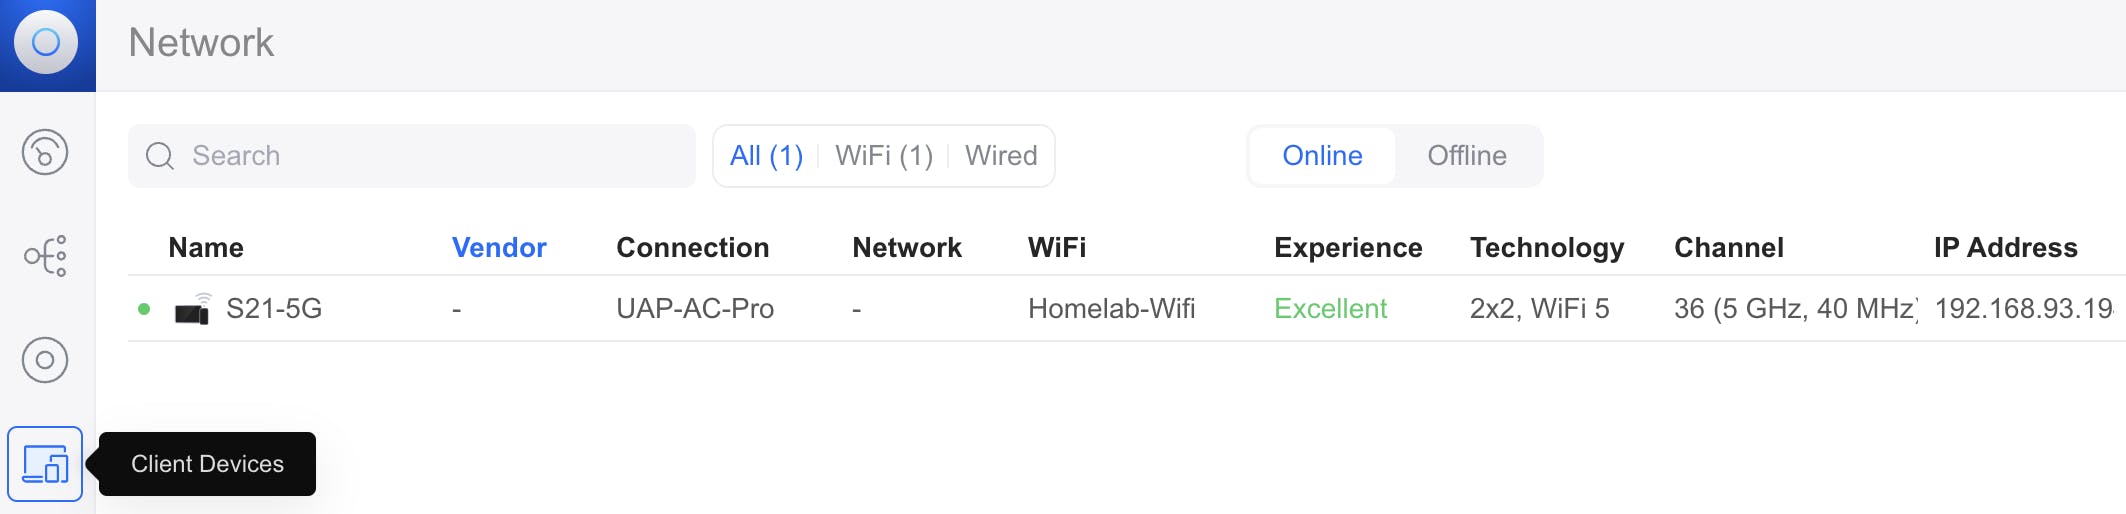
To view connected devices, click on Client Devices.
Well done! you've successfully installed & configured your Unifi controller as well as setting up your Unifi device/s.
Step 7 - Assigning a static IP Address(Optional)
If you don't want dynamic IPs assigned to your Unifi device/s, you can set a static one which is what I'll be demonstrating as an optional step:
There's more options available in the Settings menu that you can adjust based on your specific requirements.
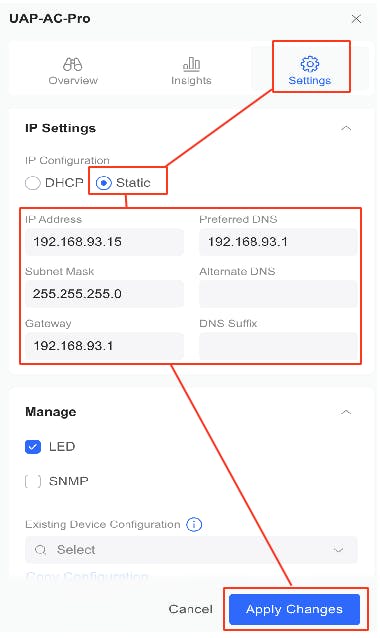
After applying the changes, it's safe to say our Unifi controller now stands ready for deployment & offering a scalable solution to manage our network infrastructure.
Final thoughts
As technology evolves & software dependencies change, it's essential to adapt & find innovative solutions to navigate these challenges. If you're looking into expanding your horizons & dedicated in becoming the IT wizard your were destined to be, DON'T stop learning/exploring or back down from any challenges that could help further your career.
By sharing my experience on the challenges I encountered, I hope to empower other IT professionals or someone looking to break into the Tech industry facing similar obstacles in their IT endeavours.
With the proper tools, right attitude & determination, any obstacle can be overcome, paving the way to success in the ever-evolving landscape of technology.